Attic Fan Installation with Thermostat Control: A Comprehensive Guide
Installing an attic fan with thermostat control is an excellent way to regulate attic temperatures and humidity levels, ensuring a more comfortable living space while reducing energy costs. In this comprehensive guide, we'll walk you through the essential tools, step-by-step installation process, and valuable tips to avoid common mistakes.
Understanding the Basics
Before we dive into the installation process, it's essential to understand the basics of attic fans and thermostat control. An attic fan is a ventilation device installed in the attic space to exhaust hot, humid air and replace it with cooler, drier air from outside. A thermostat control is a device that regulates the operation of the attic fan, ensuring it runs only when necessary.
Tools and Materials Needed
- Attic fan unit (appropriately sized for your attic's square footage)
- Thermostat control unit
- Wire connectors and wires (for electrical connections)
- Mounting bracket and screws
- Thermostat installation kit (includes a thermostat harness and other necessary components)
- Power cord and plug
- Thermostat control range (typically 60°F to 120°F)
- Full-load amps @ 120VAC (10 A, in this case)
- Heating/Cooling type (cooling, in this case)

Installation Process
Step 1: Prepare the Attic Space
Before installing the attic fan, ensure the attic space is clear of any debris or obstructions. This will provide easy access for installation and prevent any potential safety hazards.
Step 2: Mount the Fan Unit
Step 3: Install the Thermostat Control Unit

Install the thermostat control unit according to the manufacturer's instructions. Typically, this involves mounting it to the attic wall or rafters and connecting it to the attic fan unit.
Step 4: Connect Electrical Wires
Connect the electrical wires to the thermostat control unit and the attic fan unit. Ensure all connections are secure and follow safety guidelines when working with electrical wiring.
Step 5: Install the Power Cord and Plug
Install the power cord and plug according to the manufacturer's instructions. Make sure the plug is securely attached to the attic fan unit and the power cord is safely routed.
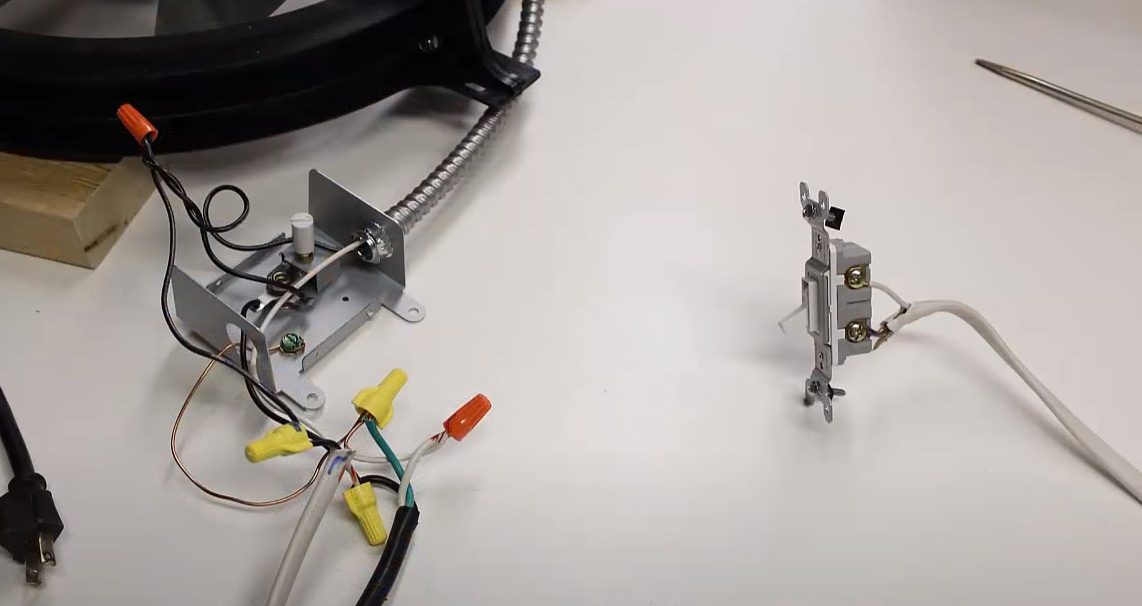
Furthermore, visual representations like the one above help us fully grasp the concept of Attic Fan Installation With Thermostat Control.
Step 6: Set the Thermostat Control Range
Set the thermostat control range according to the manufacturer's instructions. Typically, this involves setting the temperature range between 60°F and 120°F.
Step 7: Test the System
Test the attic fan and thermostat control system to ensure it's working properly. Run the fan through its full range of operation, from cool to warm, to guarantee all components are functioning correctly.


